Showing posts with label wood grain embossing folder. Show all posts

Sunday, December 15, 2013

Joyful Tidings

Each Christmas it seems a particular theme stand out to me. This year it was the miraculous appearance of the angel to the shepherds and the heavenly host singing praises to the King.  I thought the beautiful 18th century hymn by Charles Wesley, Hark the Herald Angels Sing, would be the perfect starting point for my card inspiration.

I created my own Designer Series Paper in My Digital Studio.  I took the lyrics for Hark the Herald Angels Sing and used the font called "Jefferson" (for 18th century appeal) which I downloaded from Google fonts.  I printed it on Very Vanilla card stock and used it as the back ground for my angel.


  • The angel is cut using my Silhouette Cameo E-cutter (maybe you'll get one for Christmas!)
  • The angel layer is embossed with the Wood Grain Embossing Folder and daubed with Champagne Shimmer Paint (sadly, discontinued.)
  • The sentiment (Christmas Messages stamp set) is embossed with Gold Embossing Powder and cut with the Deco Framelits

http://www.stampinup.com/ECWeb/ProductDetails.aspx?productID=131793&dbwsdemoid=2089476


http://www.stampinup.com/ECWeb/default.aspx?dbwsdemoid=2089476

Friday, July 5, 2013

Mojo Monday 300 Celebration


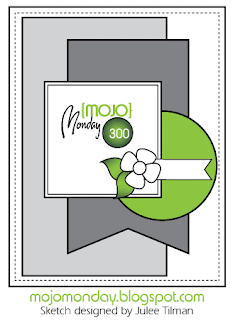
I think nautical themes and motifs are lovely.  They are perfect for many types of occasion cards, invitations to summer parties and table settings.  I also think they are perfect style for a sympathy card - there's something profound about the ebb and flow of life - and the sea is certainly a perfect metaphor.  This card was created for the Mojo Monday Sketch Challenge.

https://blogger.googleusercontent.com/img/b/R29vZ2xl/AVvXsEjMxobgcc78mTGl7rY9hYshsl4VpEoKxGz4XcwwklbxSNv1yW2wCL9wIYuqHIf4Mw2o7KpkhKyrwF9XKdFTnv2Sc46Y6gFtNdGjNOGaHcABG0qmHhyIqWR-xGvPzU0sQtHAHCsqg2xsza6s/s451/Mojo300Sketch.gif


  • For this card I used the By the Tide stamp set in clear mount. 
  • I stamped the background coral in Calypso Coral, stamping and then stamping off for shade variations.  
  • The center layer is a piece of pink pirouette cardstock embossed with the wood grain embossing folder.  
  • The square and circle shapes were both cut with my Silhouette Cameo e-cutter using shapes I imported from My Digital Studio.  The square is from the Covention 2012 photobook template and the circle is from the Fan Fair photobook template (2 of my very favorite downloads).
  • I stamped the shell image on the square in Crumb Cake ink and then used my blender pen to add some pink with Pretty in Pink, Pink Pirouette, and Calypso Coral.  I added a little sparkle with Dazzling Details and then gave it a pearly finish with Vanilla Smooch Spritz.
  • Lastly, I used a vintage faceted button and sponged it with Summer Starfruit and Old Olive Ink to give it a beach glass look.  The ink needs to dry for a few hours or it will rub off.


By the Tide stamp set


By The Tide Clear-Mount Stamp Set 
 Convention 2012 Photobook Template
Convention 2012 Photobook Template -- Digital Download
 Fan Fair Photobook Template
Fan Fair Photobook Template -- Digital Download 
Dazzling Details

Dazzling Details


Monday, June 24, 2013

A Vintage Style Thank You

I made this card to show my thanks to the wonderful group of Stampin' Up! demonstrators that I am a part of:  The Pretty Pals.  It's an delightfully eclectic group of stampers of all types, styles, and backgrounds and a continual source of encouragement and enthusiasm.

I wanted to stretch (just a little) outside my comfort zone and style for this card so I decided to reach for a color that I rarely use:  Rich Razzleberry.  I mixed it with Very Vanilla, Perfect Plum, and a pop of Summer Starfruit.  I really love the results!


It has the vintage appeal that I love and the purple colors give it a very regal, royal appeal.

Supplies:
Stamps:  Ex Libris, Daydream Medallions, Papaya Collage, Lovely Little Labels
Ink:  Rich Razzleberry, Early Espresso, Summer Starfruit
Paper:  Very Vanilla CS, Perfect Plum CS
Tools:  Stampin' Trimmer, Woodgrain Embossing Folder, Floral Framelits, Little Labels Punch Pack
Embellishments:  In Color Dahlias, Linen Thread


Tuesday, December 11, 2012

Out with the Old...

January 3 is the date for the new Spring catalog and it is full of beautiful new products that you will absolutely drool over!  But along with the arrival of new things comes the end of the availability of current products from the Holiday Catalog, which there are many I will be sad to see go.  Among my favorites of the soon to go products is the Orchard Harvest Designer Series Paper.  Fortunately, though, the Cannery Framelits and Perfectly Preserved Stamp set will still be available after January 3, 2013!

Here's the first of a set of cards I made to go in a card gift box.  The theme is one of thanks and friendship.


To make this card:


  • I cut a strip of core-dinations cardstock and embossed it with the Woodgrain Embossing Folder (still available in 2013!)
  • I cut a rectangle of the Orchard Harvest Designer Series Paper (get it while you still can!)
  • I stamped the cherry image from the Perfectly Preserved Stamp Set (still available in 2013!) on the Orchard Harvest Paper in Early Espresso and then stamped it in Real Red on Very Vanilla CS.  I used Crystal Effects on the cherries after carefully snipping them out.  

Product Highlights:

Orchard Harvest Designer Series Paper


Orchard Harvest Designer Series Paper


Perfectly Preserved Stamp Set & Cannery Framelits

Perfectly Preserved Clear-Mount Bundle


Tuesday, November 13, 2012

Thanksgiving

"Thank You" cards are really one of the most special kind of cards to receive.  It's so important to be filled with gratitude for the people in our lives and their gifts of time and attention.

Here's an autumn-themed "thank-you" card I designed using the Perfectly Preserved Bundle which includes the Perfectly Preserved stamp set and Cannery Framelits. It takes a little time to put this one together, but the extra effort will show your recipient how much their kindness meant to you.


Tips for creating this card:
  • Use Core-dinations Cardstock in Early Espresso to make a standard size card (4.25 x 5.5 folded)
  • Emboss Very Vanilla Card Stock using the Woodgrain Embossing Folder
  • Use Versamark and Pewter Embossing Powder to create the silvery jar, cut it out using the coordinating framelit
  • Mix Sugar & Spice Scented Embossing Powder with Early Espresso Embossing Powder to create the "Thank You" banner with the Itty Bitty Banners stamp set and Framelits.
  • Stamp a layer of Very Vanilla CS in the corner to create a cute interior


Favorite Stampin' Up! Products:

Perfectly Preserved Bundle:  There are so many ways to use this trendy and cute canning jar themed set!


Perfectly Preserved Wood-Mount Bundle 


Tuesday, September 11, 2012

Pals Blog Hop


Glad you could join us for some fun fall crafting with the Stampin' Pretty Pals! You've probably hopped over from Julie Trevett-Smith at The Stampin' Affair!, I'm stop number 25 on the Pals Hop and I'm glad you hopped in! I'll help you "hop along" from blog to blog where you'll find great ideas for Stampin' Up! fall projects! Should you hop off course, simply click on any of the links in the Pals Hop Line-up below and you'll be back on track

Fall is my favorite season.  I particularly love cooking and baking - it's finally cool enough to use the oven and enjoy all the delicious comfort food that I adore.  One of my favorite cooking magazines is Cooks Country.  The little rooster from the A Fitting Occasion stamp set combined with the gingham prints in the Orchard Harvest Designer Series Paper reminded me of the magazine layout.

So with that inspiration, I decided to make a gift box to hold various treats that I might bake for a friend.
  • The box is up-cycled from a cardboard pantry item box 
  • The crinkly brown paper is from a regular brown paper bag
  • I stamped the rooster right on the Designer Series Paper
  • I stamped the flower image from the Perfectly Preserved stamp set right on my brown paper bag
  • I gently un-assembled my box so I could lay it out flat and cut the top edge with my Adorning Accents Edgelit die
  • The Core-dinations Card Stock is embossed with the Woodgrain Embossing folder - it adds such a great rustic touch
  • Use sticky strip to hold everything together!


Supplies:
Stamps:  A Fitting Occasion, Perfectly Preserved, Chamomile (Stampin' Wheel)
Ink:  Raspberry Ripple, More Mustard, Lucky Limeade, Early Espresso
Paper:  Early Espresso Core-dinations Card Stock, Orchard Harvest DSP, More Mustard CS,
Very Vanilla CS
Ribbon:  Linen Thread
Tools:  Stampin' Around Handle, Big Shot, Wood Grain Embossing Folder, Floral Frames Framlits, 1 1/4" Scallop Circle Punch, 3/4" Circle Punch, Adorning Accents Edgelits Die


Now hop along for more inspiring ideas from Katie McGloin at Just Fun Stamping, stop number 26 on the Pals Fall Flair Blog Hop! Thanks for "hopping" by!


  1. Nicole Watt at Impressions By Nicole
  2. Beth Beard at My Little Craft Blog
  3. Maxine Conrad at Stamp to the MAX
  4. Claire Crotteau-Hutt at stamppaperscissors
  5. Susan Lankford at Stamp and Scrap With Susan
  6. Nicole Picadura at Scraps and Stamps
  7. Bobbi at My Therapy
  8. Mary Fish at Stampin' Pretty
  9. Barb Furlong at The Love of Stamping
  10. Rae Harper at Wild West Paper Arts
  11. Sherrie Gross at Stampin Sunshine
  12. Lynn at Cattaildesigns
  13. Dawn Tidd at Tiddbits from Dawn
  14. Kim Czenszak at Live Love Stamp
  15. Naki Rager at ...notes from Naki
  16. Kerry Willard Bray at Stampgoodness
  17. Patti MacLeith at Papercrafts by Patti
  18. Peggy Noe at Pretty Paper Cards
  19. Kim Luithle at Kim's Stampin Stuff
  20. Lori Martin at The Rejoicing Papercrafter
  21. Diane Roberts at scoreatfourandaquarter
  22. Maggie Mata at Maggie Made Cards
  23. Kris Kilcoyne at Kween Bee Kreations
  24. Julie Trevett-Smith at The Stampin' Affair!
  25. Jennifer Takacs at Stamped in Full
  26. Katy McGloin at Just Fun Stamping

Wednesday, August 29, 2012

Merry Moments Simply Scrappin' Kit

I'm not a traditional scrap-booker (but I LOVE to do it with My Digital Studio), so I generally overlook the scrapbook kits that Stampin' Up! offers.  However, this year, the kits in the Holiday Catalog are so beautiful and enticing, I took the plunge and ordered the Merry Moments Simply Scrappin' Kit to see what projects it would inspire.

I used a layout from a card I admired at the Stampin' Up! Convention - made by the creative geniuses at the Stampin' Up! home office.  That card wasn't a Christmas card - but a good layout is a good layout.

  • The printed borders look beautiful when combined together
  • To cut them to my desired length without having to pull off the whole sticker, I used my "quilting rotary cutter method"
    • Use a grid mat and ruler to measure a straight line at the distance you want to cut
    • score the sticker with the edge of a sharp pair of scissors - using the edge of the ruler as your straight edge
    • peel the sticker to the score - which, with a fold or two, should separate easily
  • The various printed circle stickers are a great accent to the edge of a card layer
  • The stamped images are from the Open Sleigh stamp set and are embossed with Pewter Stampin' Emboss Powder (which is so beautiful and has an "ooh" and "ahh" factor that leaves other embossing colors in the dust).


Product Highlights:  Click on the images to go right to my online shop and more product details!


Merry Moments Simply Scrappin' Kit:

It's just a beautiful combination of paper and design elements that have endless uses for all your Holiday projects:  cards, scrapbook pages, gift tags & bows, etc.

Merry Moments Simply Scrappin' 

Pewter Stampin' Emboss Powder:   It's a color somewhere between silver, bronze, & gold and it is gorgeous.  It still wows me every time I'm waving my heat gun over it and I see it start to shine.  
Pewter Stampin' Emboss Powder - by Stampin' Up!